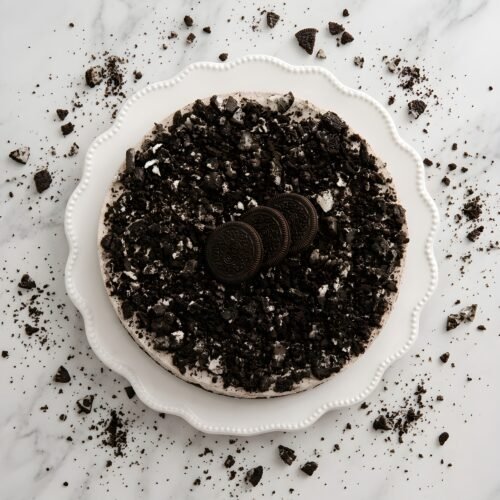
The Best Easy No-Bake Oreo Mousse Cheesecake Recipe

This easy No-Bake Oreo Mousse Cheesecake is creamy, rich, and irresistibly delicious. It features a crunchy Oreo cookie crust and a smooth, fluffy filling made with mascarpone, cream cheese, and whipped cream, creating a light and indulgent mousse-like texture. No oven is needed, making this the perfect, quick make-ahead dessert for Oreo lovers and any occasion.
Ingredients
For the Oreo Crust
- 20 Oreo cookies
- 5 tbsp/(70 g) unsalted butter melted
For the Oreo Mousse Filling
- 10.6 oz (300 g) cream cheese softened
- 8.8 oz (250 g) mascarpone softened
- ¾ cup + 1 tbsp (200 ml) heavy whipping cream 35% fat
- 10 Oreo cookies crushed
- ½ cup (60 g) powdered sugar
- 2 tsp (8–10 g) bourbon vanilla sugar
- Pinch salt
For the Topping
- 6–8 Oreo cookies
- A few chocolate curls (optional)
Instructions
- Prepare the Oreo crust. Place 20 Oreo cookies in a blender or food processor and crush them into fine crumbs. Melt the butter in the microwave in short intervals, then mix it with the Oreo crumbs until evenly combined. Press the mixture firmly and evenly into the bottom of a 7–8-inch (18–20 cm) springform pan with removable sides. Refrigerate the crust for at least 20–30 minutes to firm up before adding the filling.
- Make the Oreo mousse filling. In a large mixing bowl, beat the softened cream cheese, mascarpone, powdered sugar, bourbon vanilla sugar, and a pinch of salt until smooth and creamy.
- Whip the cream. In a separate bowl, whip the cold heavy cream until stiff peaks form. Gently fold the whipped cream into the cream cheese and mascarpone mixture until smooth, light, and fluffy.
- Crush the Oreos for the filling. Place 10 Oreo cookies in a sturdy plastic food-storage bag and gently crush them with a rolling pin or the bottom of a glass. Do not use a blender for these Oreos, as you want some small chunks rather than fine crumbs. Gently fold the crushed Oreos into the mousse mixture.
- Add the filling. Remove the chilled Oreo crust from the refrigerator. Spoon the mousse filling over the crust and gently spread it into an even layer.
- Chill the cheesecake. Cover and refrigerate for at least 6 hours, or preferably overnight, until completely set and firm.
- Add the topping. Once the cheesecake is fully chilled, sprinkle the top with the crushed Oreo cookies and add a few chocolate curls, if desired.
- Remove from the pan and serve. Carefully release and remove the removable sides of the springform pan. Because the mousse is soft and delicate, a springform pan makes it much easier to remove the cheesecake while keeping its edges neat and beautiful. Slice and serve chilled.
Notes
Use a springform pan: A pan with removable sides makes it much easier to release the soft mousse cheesecake without damaging the edges.
Use cold heavy cream: Cold cream whips more easily and gives the mousse a lighter, fluffier texture.
Chill the crust first: Make sure the Oreo crust is chilled and firm before adding the mousse filling so the layers stay neat.
For a lighter, whiter filling: Crush the Oreos into larger pieces and fold them in at the very end, gently mixing just until evenly distributed. This keeps the mousse lighter in color while adding little Oreo cookie pieces throughout.
For a darker, more Oreo-flavored filling: Crush the 10 Oreos into smaller, finer crumbs and mix them into the filling earlier. The fine Oreo crumbs will blend into the mousse, giving it a darker, slightly grayish color and a stronger Oreo flavor.
For the best texture: Chill the cheesecake for at least 6 hours, preferably overnight.
How to Get Perfect, Clean Slices: For beautiful bakery-style slices, wrap your springform pan with a warm towel for 30 seconds before removing the rim. Wipe your chef's knife clean with a hot, damp cloth between every single cut.
Storage & Freezing: Store leftovers in an airtight container in the refrigerator for up to 4 days. You can also freeze this cake! Wrap it tightly in plastic wrap and aluminum foil for up to 2 months. Thaw in the fridge for 2–3 hours before serving—it tastes just like a gourmet Oreo icebox cake!